Monday 19 November 2012

debri shelter

How to Build a Survival Shelter


Sleeping outside in a primitive survival shelter with no tent and no sleeping bag?! In the rain? Are you crazy?
This idea may indeed seem crazy and a bit daunting to many of us. However, with a couple of hours, proper materials and the right mindset, constructing and sleeping in a primitivesurvival shelter can be a life-changing experience. Although there are many types of group and individual primitive survival shelters, at Wilderness Awareness School, we often begin by teaching our students how to build a survival shelter called a debris hut. These structures are fairly easy to construct and can be a warm, dry place to spend the night.
First of all, location is key. Aside from the normal criteria which includes avoiding low spots, steering clear of standing dead trees, etc….proximity to materials can save a lot of time and energy. Take the time to find a spot that feels right.
For construction, the first thing you’ll need to build a survival shelter is a strong ridegepole that is at least a little taller than you are with your arm stretched above your head. You’ll also need something for one end of the ridgepole to securely rest on—a stump, boulder, fork of a tree, some kind of prop. The other end rests on the ground. At the high end, the ridgepole should be at about hip height.
Once your ridgepole is in place, you’ll need ribbing. Lean the ribs against the ridgepole fairly close together leaving a door at the high end. Once ribs are in place, crawl inside feet first checking to see that you have a little room to move, but that it is still snug and cozy. If your survival shelter is too big, you will have trouble staying warm. Imagine you are making a sleeping bag out of natural materials!
debris hut
Drawings by Laura
Next, add a layer of lattice, something to act as a net to hold debris in place when it is piled on next. Brush and twiggy branches may work well. The debris that you have available can help determine how small the spaces in your lattice can be.
The structure is now in place and it is time for the essential component of insulation. Of all the things you’ll learn about how to build a survival shelter, not having enough insulation on a cold night will teach you quickly what is required. Get ready to shuffle your feet or makeyourself a rake and start gathering debris! For good insulation, you’ll want material that can trap air. Obviously, dry material is optimal. Pile on your leaves, ferns, grass, or other available debris.
Keep piling, keep piling, go for TWO FEET THICK or more if you might get rained on. Be sure to close up the door area so that you have just enough room to squeeze in without disturbing the structure. Crawl in to see how your cocoon feels. Finish up your insulation by adding some small branches that will hold the debris in case of wind, maintaining as much loft as possible.
Now that the outer layer is complete, it is time to stuff your primitive survival shelter with dry soft debris. If you only have wet leaves, use them anyway, you may get wet, but you can still be warm. Once your shelter is full of debris, wiggle in to compress a space for your body. Add more debris as needed, and don’t forget the foot area! Fill up the spaces if you are concerned about being cold. Before you crawl in for the night in your primitive shelter, gather a pile of leaves near the door so that you can close yourself in most of the way.
Aside from having a great story to tell your grandkids one day — or from being able to teach others how to build a survival shelter, spending a night in a survival shelter like a debris hut is an opportunity to overcome fears and gain feelings of freedom and confidence. Pushing our mental and physical comfort edges also brings us chances to find greater comfort and appreciation in our daily lives. HAPPY BUILDING AND SWEET DREAMS!

How to Build a Survival Shelter

http://www.eseeknives.com/AAO_Apr11.pdf

 The debris hut is one of the fastest and easiest shelters you can make with no tools or special equipment. The concept in construction is very much like the way some animals, like squirrels, build their homes or nests. Depending upon how well it is constructed it is a very snug, warm and dry shelter good for tempratures ranging from well below -10°F to 90°F even without fire or proper clothing.
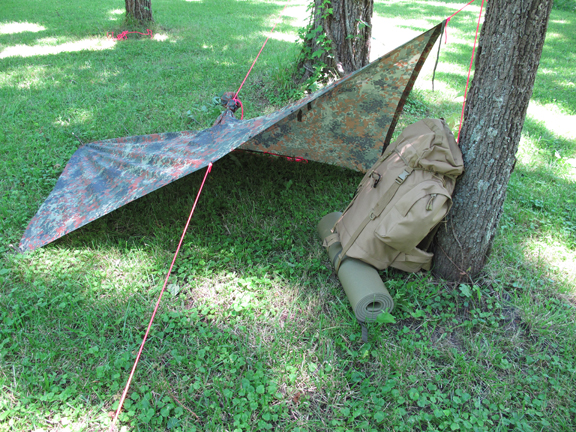
It is constructed out of debris found on the forest floor. The debris can be anything from dirt, snow, leaves, pine needles or anything that will trap insulating dead-air space. In fact, more debris = warmth, so you can never pile on too much debris. The debris forms the insulating layer that keeps the heat (your body heat) inside the structure, and so keeps you warm. Actually, the picture above is of a debris hut I made out of pine needles with Phragmite door embelishments.

As a rule where cold and/or wet conditions exits and hypothermia may be a risk, at least 24" of debris covering the top and sides is required.

Debris Hut Insulation Chart
Debris Amt. Temp.
36" (approx. 3') down to 30°F
48" (approx. 4') down to 0°F
54" (approx. 5') down to -20°F
66" (approx. 6') down to -40°F
You enter this type of shelter feet first and you may even bring in extra debris to pack around you once inside. Use debris on the floor for as a pad for sleeping and to retain body heat that can be lost by laying on the cold bare ground.

Mark your debris hut so you can find it from the outside easily. The nature of the debris hut is that it blends in perfectly with the surroundings. If someone is trying to find you they will have a hard time seeing your hut.

If you are concerned about creepy-crawlies that live in the debris or may take up residence in your hut simply smudge the inside of your debris hut out with braided sage or a leafy branch for about 15-30mins.

WARNING: Since the Debris Hut is essentially a giant tinder bundle, NEVER build a fire inside your debris hut. Make sure your fire is well away from your hut.

Sunday 18 November 2012

Homemade shelter stove with chimney

Could be good to make home made light stove with chimney which goes under ground then just lets out smoke just on surface.

Winter Shelter and Homemade Stove - YouTube

Wool jacket winter clothing


Cardboard good ground insulation

Bring cardboard and some foil to insulate from ground


Poncho multi uses

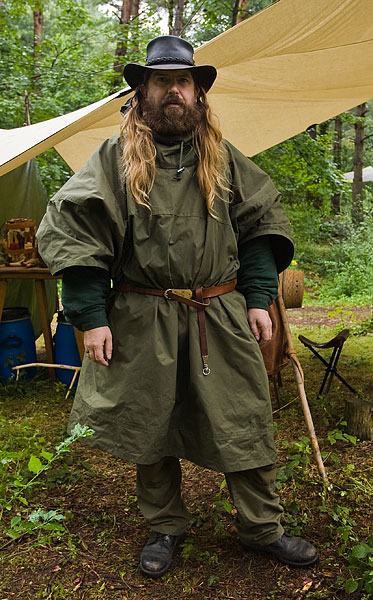
I have been looking at the german rubberised poncho which is pretty much 100% waterproof and is pretty fire resistant and tough

Features:

-Drawstring on hood
-8 eyelets with cords on corners for tying down
-8 press studs 

Uses:
-Poncho
-Emergency sleeping bag cover- make into tube
-shelter/ tent- join two ponchos together with press studs
-bivi
-ground sheet
-tarp
-rain catcher


Macgyered sleeping bag goes inside poncho from blanket and space blanket 

WWII navy blanket, folded it in half and then sewed it across the bottom and 3/4 of the way up the side. I then took a space blanket, folded it over and taped it together (totally waterproof). Putting the wool blanket inside the space blanket makes for a decent sleeping bag and keeps out moisture from the ground.


SOE Day Audley End 006

great uses for ponchos-- even a sail for kyaks In the Same Boat - Paddling.Net

Great bug out kit:
-gortex boots
-waterproof trousers
-bivy bag
-rubberised poncho
-self inflating mat


Great little instruction video


Sunday 4 November 2012

Horse Hoof Fungus

Video on how to process Horse Hoof Fungus:

-Chisel out inside of fungus
-Chisel off hard exterior
-wet amadou then hammer out


Saturday 3 November 2012

Tanning and Processing Hides

Process Hides (There are many different methods. Dry-scrape, wet-scrape, braining, smoking, pre-smoking and fur tanning ...)

 ----------------------------

How to Defrorst Skins

 When I bring home deer hides that are frozen and rolled two to a plastic trash bag, I hit them with a hose on the outside, then drop them in a 33 ga. Rubbermaid trash container for a while. I work on them a little, unrolling them as  they thaw a bit. After 3 hrs or so I expect to have them at least pulled apart. At that point I will change the water, wash  them well with the hose and return to fresh water in the barrel . Using the warm water will help for sure at the first step, and I have done that many times, but be sure to change to cold for soak till you are ready to transport to avoid spoilage.

Soak overnight/ thaw

---------------------------- 

-Skin hide from carcass

-If you do not plan to tan the hide immediately after skinning it, remove as much of the flesh, fat, membranous tissue as possible. Lightly sprinkle salt over the inside (hairless) of the hide, tightly roll it and place in a freezer

-The removal of the fat, flesh and tissue is the most important step. Place the hide on a large flat surface for scraping the flesh side of the hide. Make sure all the fat and flesh is completely removed or the hide will not tan properly. Warning: this process should not be rushed. It is hard work and requires time and patience. A sharp knife makes for quick work, but there is too much risk of ruining the hide with a slip. Scrapers made of bone or brass tube with a flattened end

- Hair Removal (or skip to next step if want hair on)

If you plan to tan both sides of the hide to make buckskin. Mix One (1) gallon of hardwood ashes, Two (2) pounds of slaked lime, with five gallons of warm water in a large barrel. Stir until dissolved. Immerse the hide. Stir two or three times daily for three to four days or until all the hair comes off easily. Warning: If the hide is left in the mixture too long, it will deteriorate.
Remove the hide from the barrel and rinse in cold water. Place the hide on a raised surface with the hair side up. Use the back of a knife blade or wood scraper to scrape off the hair. Rinse the de-haired skin several times with clean water. Place the hide back in the empty barrel. Pour in ten (10) gallons of cold water and two (2) quarts of vinegar. Replace the hide and soak for 24 hours. Stir every 4 hours. After 24 hours, empty the garbage can and fill it with clean water. Soak the hide in the clean water overnight.


-CLEANING- NEUTRALIZING
 Dissolve one (1) pound of alum in one (1) gallon of warm water in a small bucket. Pour 2 ½ pounds of salt in the large barrel with four (4) gallon of cold water. Pour the contents of the small bucket into the large barrel and mix thoroughly. Replace the hide in the large barrel and soak for six (6) to seven nine (9) days, depending on the weather. Stir the mixture a couple of times a day making sure the entire hide is always immersed. After soaking, remove the hide, drain and thoroughly rinse.

-DRYING - SOFTENING
 Place the wet hide out of the direct sunlight on an upright flat plywood surface with flesh-side out. Allow to partially dry and rub lightly with warm Neat’s Foot Oil. Remove it from the board and repeat the process on the other side. Remove excess oil with an absorbent cloth.

-SOFTENING 
Lightly dampen the hide with a cloth. Remove excess water. Gently rub the hide using a back-and forth motion across a smooth (no splinters please) surface, a log, saw horse, metal pole. Continue the process until the hide is soft and supple. Very lightly apply Neat’s Foot Oil when needed.

-SANDING
 After softening the hide, rub fine grit sandpaper over the surface of the hide to remove tool marks and further soften the leather. When it looks very soft and smooth, your buckskin is ready for use in making clothing, bags, wall handing or anything else you desire.

---------------

How to Tan using Leder Tanning Kit:

-Flesh them, removing all meat, fat or inner membrane off the skin

 - Skin should be salted immediately after skinned, rub salt well into the skin and fold in half, and then half again the other way. when folding, it's flesh to flesh, so theres just hair showing on the outside, then just fold over, you don't want exposed skin air drying so much faster then the salted inner parts.

 -if wish to store then follow step otherwise skip
Then place on a slope of around 10 to 20 degrees with the open ends downhill and place a flat piece of wood on top and few blocks, brick or rocks to press it down and squeeze out the moisture. the next day scrape off all the old wet salt, save this to dry and re-use on another skin, and re-apply dry salt, refold and weigh down again. Drying to a stiff stage like heavy old damp oilskin will do, but better is to about the stiffness of old cardboard.
Skin must be tanned within one month.

- Mix Leder Tanning Formula with water in a suitable bucket or tub. Place skins and salt into the solution. The tanning process takes between 3 to 10 days depending on the thickness of the skins.

- When the tanning process is complete, wash skin and apply Leder Leather Lube with a soft brush. Peg out skin to dry.

---------------

More details Tan with Leder tanning Kit:


good link : Eight Acres: Tanning a hide

9.5 Seconds? (or: Skinning Newbie) - New Zealand Airgunners Forum


http://www.lifestyleblock.co.nz/lsb-forum/showthread.php?t=13017

---------------

Preparing Hides

 http://www.ehow.com/how_5728456_prepare-hides-tanning.html

---------------
 How to Smoke Tan Skin

http://www.wikihow.com/Tan-a-Hide

  1. Clean the flesh side of the hide by scraping it with a blade. Bone fleshers were once used for this purpose. You want to remove all the flesh and blood stains.

  2. Soak the fleshed hide in clean water for three days and three nights. If you want a plain skin rather than a fur, de-hair it: wring the hide out and fasten one end of it to a fence or tree, and scrape the hide to remove the hair. If the hair is really long, cut it first. Go against the grain of the hair, and scrape away from yourself.
  3. Soak the fleshed and de-haired hide in a mixture of brains and water. Every animal has just enough brains to tan its hide. Simmer the brains in water with a little fat in it, then rub the mixture onto both sides. Rub it in well until it is almost absorbed. If the hide is dry, get it wet and soft before rubbing on the brain mixture. Now sprinkle the hide with warm water and roll it up tightly. Let it set overnight.
    • There are also more convenient chemical tanning methods.
  4. Loop the hide over a stout stick, then take the two ends and twist the hide into a thick rope.
    Loop the hide over a stout stick, then take the two ends and twist the hide into a thick rope.
    Loop the hide over a stout stick, then take the two ends and twist the hide into a thick rope. Roll the sides up toward the middle first. Use another stout stick at the other end and overlap the ends. Grab hold of the ends and the stick and wring the moisture out of the hide. This also stretches it. Place the hide on a big piece of wood and scrape it again on both sides to remove any remaining little scraps of flesh, hair, or liquid. Now you need to stretch the hide back to its original size.
  5. Hold onto the hide tightly and use your hands and feet to stretch it as much as you can. Make a rough wooden frame larger than the original hide. Punch holes all around the edges of the hide, about 3 inches (7.6 cm) apart. Use leather thongs or waterproof cord to attach the hide to the frame, making the hide taut.
  6. Turn to the hair side and work the hide with your hands and a tool to soften the hide and stretch it. In the old days people used a bone or antler with a stone lashed to it, but later on people used a tool like a small hoe. Guide the scraper with your left hand and use your right hand to press hard to break the hide down and soften it. You'll have to tighten up the cords now and then to keep it taut.
  7. Note that once the skin is soft, pliable, and dry it is ready to be smoked. Stitch up any holes in the hide, then sew it up the sides of the hide to make a bag. Close one end so it is pretty tight - tight enough to hold the smoke. Invert the skin bag over a hole about a foot across and half that deep. Use sticks to make a rough frame to hold the skin bag open, and you can tie the closed end to a tree or use another long stick to keep it up.
  8. Make a small smoky fire built in the hole to smoke the skin. Once the little fire has a coal bed built up, start adding smoke chips to it and peg the skin around the hole. A little channel tunneled out to one side will allow you to keep the fire supplied. Once the inside is smoked, turn the bag inside out and smoke the other side. The smoking doesn't take very long. A very thin hide might be done in ten minutes (one side). Thick moccasin hide might take an hour.


---------------

Tools:

-C clamps (useful for stretching out skins without piercing/ tearing)
-Sapling frame or slanted plywood
-Bucket
-Brass tube with flattened end (seen on Ray Mears)
-wooden clothes pegs

Materials: (optional)

-Hide
-Oak Bark
-Lime
-Vinegar
Borax

------------

How to Tan with Borax

http://www.ehow.com/how_7317939_tan-borax.html


----------------

How to make Sheepskin

http://www.ehow.com/way_5537857_directions-make-sheepskin.html

---------------

Ray Mears and Trapper Jake


http://www.youtube.com/watch?v=7QxaO4teWmA

----------------

Hair on Skin Tanning

http://www.manataka.org/page27.html

----------------

There are three cardinal rules in hunting wild life. Violate them and you risk becoming nothing more than a bloodthirsty butcher of life.
Preservation:  Never take the first animal you see.  Let it go.  The chances are you will see more.  If you do not see another all day, chances are your decision to allow the first to go free was a wise one.  It is obvious the population in the area is small and killing the first animal may be among the last you will see in that area for many years.  Do not be greedy in thinking "If I do not kill this one, someone else will."  Do not be lazy by thinking, "Oh gosh, should I continue to tromp around these woods all day?  This may be my last chance."   Do not rely on government bureaucrat so-called scientific population counts.  Do your part to keep a strong population by never killing the first in-season animal you see.   
  
Respect:  Kneel where the animal fell and give thanks to the animal spirits and the Creator for providing food for your family. Show respect for the animal and its family. Apologize to the animal for taking its life. Leave in the place where the animal fell something useful to its cousins. Corn or a small piece of salt lick is good for deer. This last piece of advise about leaving a gift can cause a problem because it may be at first thought by a game warden that the gift is "baiting", an illegal act in most jurisdictions.  We do not have any suggestions for avoiding this conflict of thought, however, we believe that an act of kindness, even if temporarily misunderstood, will be sorted out by a discerning game official in a good way -- especially if you live in the area, they know you and you have informed them of your philosophy before hunting.  

Responsible Use:  Use every bit of the animal. Leave as little as possible. Again, the key word is respect. Wasting precious life is a violation of the Creator’s laws of nature. There are many good uses for the less desirable parts of the animal.

 http://www.manataka.org/page27.html


Thursday 1 November 2012

Red and White Clover


Red Clover:
-The leaves, flowers, seeds, and roots of clovers are all edible.

-The young leaves, taken before the plant flowers, can be eaten raw in salads. As the plant matures, cooking the leaves is recommended. The dried leaves are said to add a slightly vanilla-like flavor to baked goods. In my own experience with clover leaves, I found them to be rather bitter (maybe I picked them at the wrong time). I stick to the flowers.

-The roots should be eaten cooked.

-The flowers and seeds are the parts of the clover that are of greatest interest to most foragers. The flowers are used raw in salads as well as sauteed, stir-fried, or fried as fritters. They are also popular for making teas and wines.

-The flowers and seeds can be dried and ground into a flour.

Here are a few clover recipes: